May 8, 2026
How to set up your first Web Agent in YouEx.ai
Your Web Agent is the front door of your revenue workflow. It captures inbound leads from your website and kicks off the automated research, scoring, and routing that follows.
Check out the 5-minute walk-through here on YouTube.
If you haven’t already, sign up for a free trial. As the name suggests… it’s free!
But it’s not the only door. YouEx.ai Engage captures leads from multiple sources:
Web Agent conversations: visitors who chat with your agent on your website
Spreadsheet imports: upload a CSV or Excel file from a conference, webinar, content download, or any other source
Business card and QR code capture: scan a card or QR code and the system creates a contact automatically
MCP integrations: pipe leads in directly from your existing tools via the Model Context Protocol
However they come in, every lead goes through the same automated workflow: research, scoring, and routing to the right seller. No manual work required.
Pro tip: Create separate agents for different entry points — your homepage, pricing page, and contact page often attract different types of visitors with different intent levels. Here’s how to get your first one up and running in 5 minutes:
Step 1: Click on Agent Manager and take a look around.

For now, we’ll keep focused on getting the Web Agent live on your site with these tabs:
Knowledge Bases: These are collections of Web Pages and Files used by your Agent
Agents: Intelligent chat agents that live on your website, answer questions, collect info from visitors, and create new leads with that info.
Step 2: Create your Knowledge Base
Your Knowledge Base is what your Agent uses to answer questions and also to handle gated content. Use this tab to scrape and ingest your website and add white-papers, slides, or other files.
Do you ever struggle to surface the right information at the right time on your website? Your web agent can help!
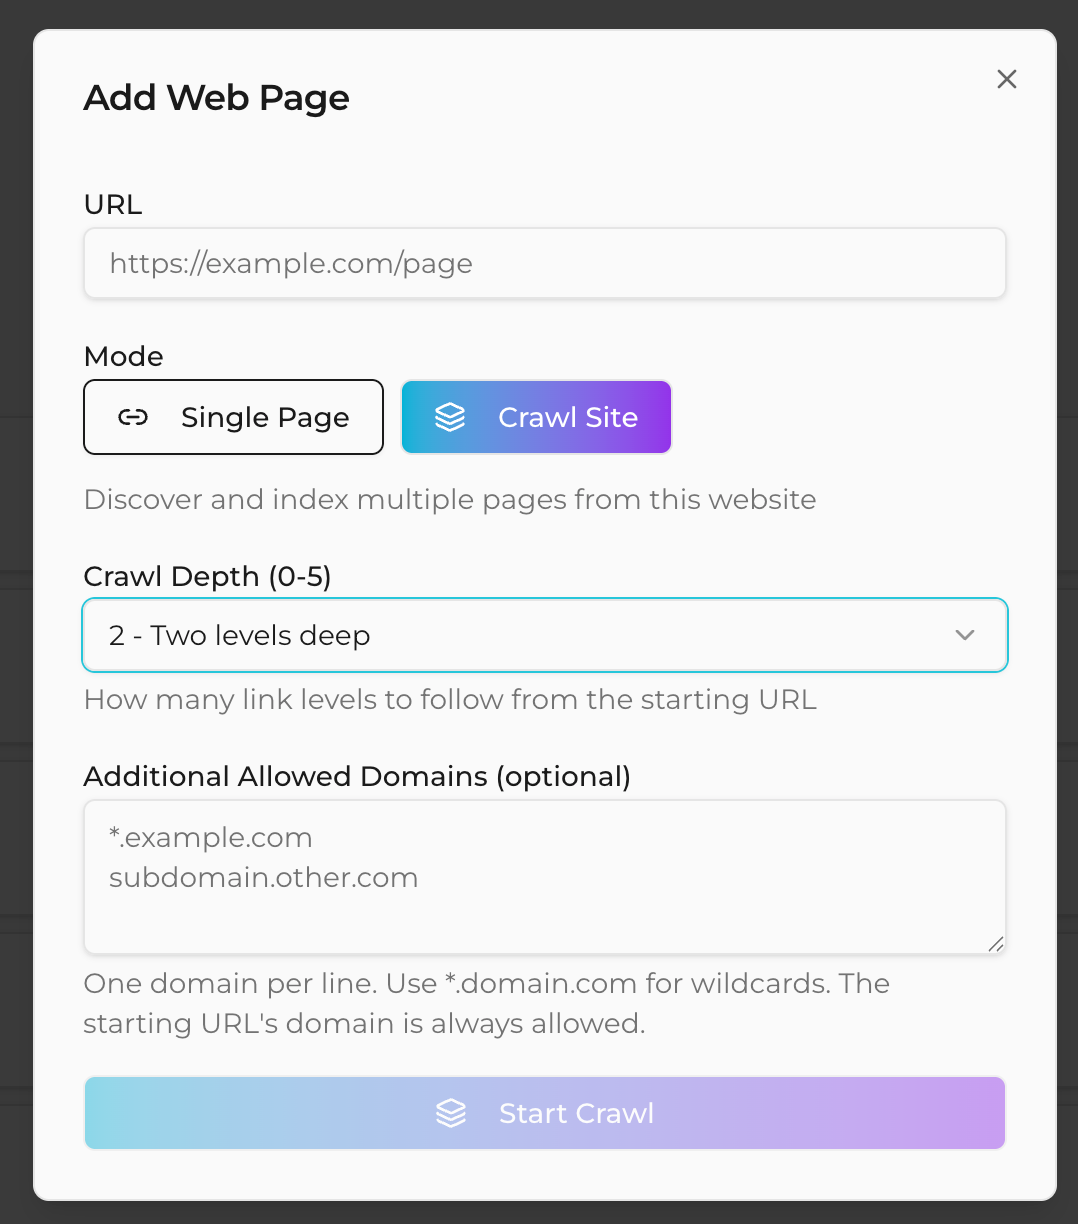
Just enter the URL to scrape, choose a Crawl Depth (how many links it should follow when scraping) and choose Crawl Site. Ingestion will happen in the background so we can move on to the next steps immediately.
Step 3: Create your new Agent!
Been reading up on AI Agents and feeling overwhelmed with the jargon? Don’t worry, this step is easy. You’ll have an agent ready to deploy on your website in just a few minutes.
When you create a new agent, you’ll fill in a handful of settings that control how it looks and behaves. The basics are straightforward — give it a name, write a welcome message, and set a system prompt that describes how you want it to handle conversations. You can also add conversation starters (suggested questions visitors can tap) and restrict which domains the agent is allowed to appear on.

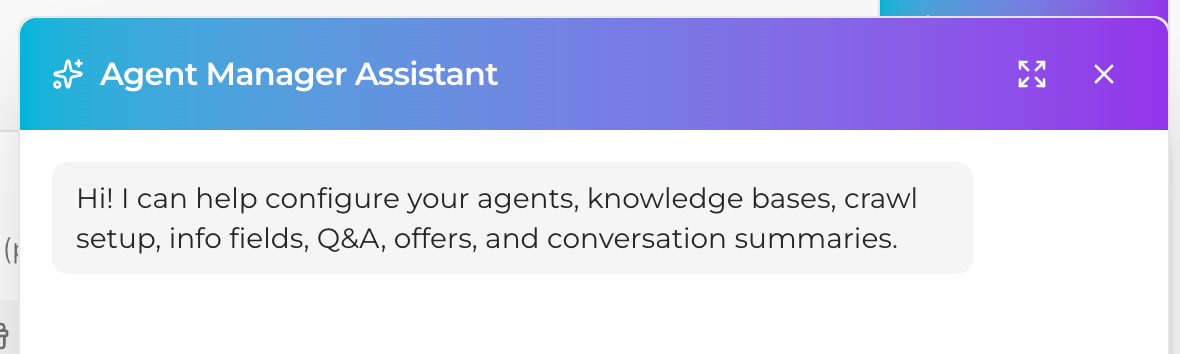
Still need help?
Yo, I heard you like Agents, so I got you an Agent for your Agents.
Check it out in the bottom right corner of the screen. You can just ask it to make your agent for you.
Step 4: Configure Additional Behaviors
Q&A pairs — for answers that can’t drift
Some questions need an exact, consistent answer every time — pricing disclaimers, privacy requests, support redirects, policy questions. Q&A pairs are how you handle those. Think of them as hardcoded responses that always fire before the AI has a chance to improvise. Use them sparingly, but use them for anything where the wording actually matters.
Info fields — what you want to collect
Info fields tell the agent what to ask visitors. This is how you capture lead details, qualify prospects, gate content behind a form, or collect the information needed before booking a meeting. Set up the fields you need and the agent handles the rest — it knows when and how to ask without being pushy about it.
Offers — what happens after they engage
Once a visitor has shared enough useful information, you can have the agent present an offer — a download, a link, a promo code, or a consultation booking. Offers are the natural payoff at the end of a productive conversation.
Step 5: Test and Deploy!
Deployment is simple. Use the Test tab to make sure everything is working as expected, and then head over to Deploy to configure the look & feel of the agent for your site. Copy/Paste the Javascript code into your Web CMS (Wordpress, etc.) of choice and congratulations... you’re live!
Before you walk away, a few things worth knowing for the road:
Your system prompt should focus on how the agent behaves, not what it knows. For facts about your product, use the knowledge base — that’s what it’s there for. For anything where you need word-for-word consistency, use Q&A pairs. And always test after making significant changes before you push anything live.
Want more help? Book a guided tour!